
TL;DR
- Barcode scanning eliminates manual data entry errors in warehouse operations
- Complete setup takes 2-4 hours for single warehouse, 1-2 days for multi-location
- Requires Odoo Enterprise Edition (barcode module not in Community)
- Hardware costs: $150-500 per scanner depending on requirements
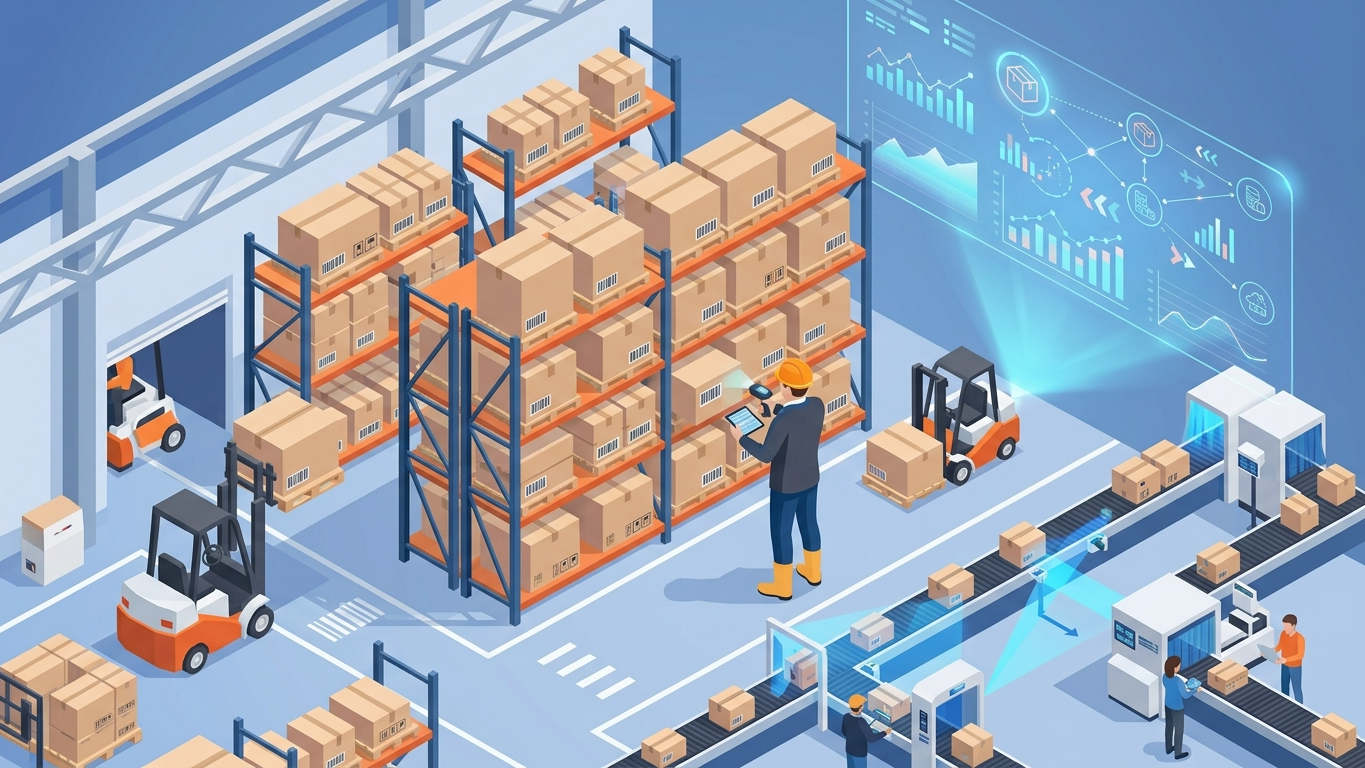
The Warehouse Accuracy Problem

Manual inventory operations are slow and error-prone. A typical warehouse worker processing deliveries by hand makes 2-4 data entry errors per 100 transactions. These compound into stock discrepancies, shipping mistakes, and customer complaints.
Companies implementing barcode scanning see immediate improvements:
- 99%+ inventory accuracy vs 85-95% with manual entry
- 3x faster picking operations during order fulfillment
- 60% reduction in shipping errors and returns
- Real-time visibility into stock movements and locations
This guide walks through complete barcode implementation in Odoo, from initial configuration to production deployment with mobile scanners.

How Odoo Barcodes Work
Odoo's barcode module uses standard barcode symbologies (Code 128, EAN-13, UPC, QR codes) to identify products, lots, locations, and documents. When a barcode is scanned, Odoo:
- Captures the scan from hardware scanner or mobile device
- Parses the barcode based on configured barcode rules
- Matches to records (product, lot, location, etc.)
- Executes the operation (validate transfer, add to cart, etc.)
The system supports multiple scanning modes: manual entry via keyboard wedge scanners, mobile app scanning using phone cameras, and industrial RFID integration for high-volume operations.

Prerequisites
Before starting barcode implementation, ensure you have:
- Odoo Enterprise Edition (barcode module not available in Community)
- Warehouse Management module installed
- Products configured with barcodes or barcode patterns defined
- Warehouse locations set up (stock, input, output, packing zones)
- Barcode hardware (scanners, mobile devices, or printers)
• Budget: USB laser scanners ($50-150) - plug-and-play with any computer
• Mobile: Android/iOS phones with Odoo Barcode app (free)
• Professional: Zebra/Honeywell handheld terminals ($300-800)
• Industrial: RFID gates and fixed scanners ($2000+)
Step 1: Enable Barcode Module
Navigate to Apps menu and search for "Barcode". Install the Barcode module if not already active.
Configuration path: Apps → Search "Barcode" → Click Install
Once installed, a new Barcode menu appears in the main navigation. This is the central interface for all barcode operations.
Verify installation:
- Go to Barcode app from main menu
- You should see operation types: Transfers, Inventory Adjustments, Manufacturing Orders
- If menu is missing, check user permissions (Barcode / User access rights)
Step 2: Configure Barcode Nomenclature
Barcode nomenclature defines how Odoo interprets scanned codes. This is critical for distinguishing between product barcodes, internal references, and lot numbers.
Configuration path: Inventory → Configuration → Settings → Barcode Scanner section
Key settings:
- Barcode Nomenclature: Select default nomenclature (usually "Default Nomenclature")
- Barcode Scanner Interface: Choose "Manual Input with Camera" or "USB Scanner"
- Scan Cashiers: Enable if using barcodes for POS user identification
Custom nomenclature rules (for advanced setups):
Go to Inventory → Configuration → Barcode Nomenclature to create custom patterns:
- Product barcodes: EAN-13 (13 digits), UPC-A (12 digits)
- Internal barcodes: Code 128 with prefix "INT"
- Lot barcodes: Code 39 with lot number encoding
- Location barcodes: Code 128 with location path
Step 3: Add Barcodes to Products
Every product needs a barcode assigned. You can use manufacturer barcodes (EAN/UPC) or create internal barcodes.
Single product setup:
- Open Inventory → Products → Products
- Select a product or create new one
- In the Inventory tab, find the Barcode field
- Enter the barcode number or scan it with your scanner
- Save the product
Bulk barcode import:
For large catalogs, use CSV import:
- Export current products: Inventory → Products → Products → Actions → Export
- Add "Barcode" field to export
- Fill in barcodes in spreadsheet (or use manufacturer data)
- Import back: Inventory → Products → Products → Favorites → Import Records
"Internal Reference","Name","Barcode"
"WIDGET-001","Blue Widget","5901234123457"
"WIDGET-002","Red Widget","5901234123464"
"GADGET-PRO","Pro Gadget","INT123456"
Barcode generation for internal products:
If products don't have manufacturer barcodes, generate internal ones:
- Use sequential numbering: INT000001, INT000002, etc.
- Include product category prefix: ELEC-0001 (electronics), FURN-0001 (furniture)
- Print barcode labels using Inventory → Reporting → Barcode Labels
Step 4: Configure Warehouse Locations for Scanning
Location barcodes enable precise tracking of where products are stored. This is essential for efficient picking and cycle counting.
Enable location barcodes:
- Go to Inventory → Configuration → Settings
- Under Warehouse section, enable "Multi-Step Routes" and "Storage Locations"
- Save settings
Add barcodes to locations:
- Navigate to Inventory → Configuration → Warehouse Management → Locations
- Open each location (WH/Stock, WH/Stock/Shelf1, etc.)
- In the Barcode field, enter or scan the location barcode
- Save
Location barcode best practices:
- Encode the path: WH-STOCK-A01-B02-C03 (warehouse-stock-aisle-bin-shelf)
- Use hierarchical structure: Matches your physical warehouse layout
- Print durable labels: Industrial-grade adhesive labels for metal shelving
- Place consistently: Same position on each rack (e.g., top-left corner)
Step 5: Set Up Barcode Operations
Configure which operations can be performed via barcode scanning.
Transfer operations:
- Go to Inventory → Configuration → Operation Types
- Select an operation type (e.g., Delivery Orders, Receipts)
- Under Barcode Settings, configure:
- Use Existing Lots: Enable to scan existing lot numbers
- Create New Lots: Enable to create lots on-the-fly during scanning
- Force Detailed Transfer: Require scanning each product (prevents bulk validation)
Inventory adjustments:
- Go to Inventory → Operations → Inventory Adjustments
- Create new adjustment or use barcode app directly
- Scan product barcode → Enter quantity → Validate
Manufacturing orders:
- Scan work order barcode to start production
- Scan component barcodes to consume materials
- Scan finished product barcode to complete order
Step 6: Configure Mobile Barcode App
Odoo's mobile barcode app turns smartphones into professional scanners.
Install the app:
- On Android: Download "Odoo Barcode" from Google Play Store
- On iOS: Download "Odoo Barcode" from App Store
- Open app and enter your Odoo database URL
- Login with user credentials (must have Barcode / User permissions)
Configure mobile scanning:
- In mobile app, go to Settings
- Enable camera permissions
- Test scanning with a known barcode
- Adjust scan sensitivity if needed (for poor lighting conditions)
Mobile app operations:
- Transfers: Scan products during picking/packing
- Inventory: Cycle counts and stock adjustments
- Manufacturing: Record production operations
- Point of Sale: Quick product lookup and checkout
Step 7: Test Barcode Workflows
Before going live, test all critical workflows end-to-end.
Test scenario 1: Receiving goods
- Create a purchase order with 3-5 products
- Confirm the order
- Open Barcode app → Select "Receipts"
- Scan each product barcode as you "receive" them
- Validate the transfer
- Verify stock levels increased correctly
Test scenario 2: Picking for delivery
- Create a sales order
- Confirm and generate delivery order
- Open Barcode app → Select "Transfers" → Choose delivery
- Scan products from shelf locations
- Move to packing zone, scan again to verify
- Validate and ship
Test scenario 3: Inventory adjustment
- Go to a physical location in warehouse
- Open Barcode app → Select "Inventory"
- Scan location barcode
- Scan each product in that location
- Enter counted quantities
- Validate adjustment
Document test results:
- Record any scan failures or misreads
- Note products with poor barcode quality (reprint if needed)
- Verify all operations post correctly to inventory
Step 8: Train Warehouse Staff
Successful barcode implementation requires proper training.
Training curriculum:
- Day 1: Basics
- How to hold and use scanner (distance, angle, beep confirmation)
- Understanding scan feedback (green=success, red=error)
- Basic operations: receiving, picking, inventory counts
- Day 2: Advanced
- Handling scan errors (damaged barcodes, wrong products)
- Manual entry fallback when scanning fails
- Lot/serial number tracking procedures
- Day 3: Production
- Supervised live operations
- Speed and accuracy benchmarks
- Troubleshooting common issues
Quick reference cards:
Create laminated cheat sheets for each workstation:
- Common scan sequences for their role
- Error codes and what they mean
- Who to contact for technical issues
Advanced Configuration
Once basic scanning is working, consider these advanced features:
1. Multi-warehouse barcode routing
- Configure location barcodes to include warehouse prefix
- Set up rules to prevent cross-warehouse scanning errors
- Use inter-warehouse transfer barcodes for stock moves
2. Lot and serial number tracking
- Enable tracking by lot or serial number on products
- Configure barcode rules to parse lot numbers from GS1-128 barcodes
- Set up automatic lot creation during receiving
3. Quality control checkpoints
- Add barcode scan points at quality inspection stations
- Require scan validation before proceeding to next step
- Record quality results linked to specific lots
4. Integration with label printers
- Configure Zebra or Dymo printers for on-demand label printing
- Set up barcode label templates in Odoo
- Enable automatic label printing after receiving
Troubleshooting Common Issues

Problem: Scanner not recognized
- Cause: USB scanner not in keyboard wedge mode
- Solution: Scan configuration barcode to set keyboard wedge mode, or check USB connection
Problem: Barcode scans but nothing happens
- Cause: Barcode not linked to any product or wrong operation context
- Solution: Verify barcode is assigned to product, check you're in correct barcode operation
Problem: Wrong product scanned
- Cause: Similar barcodes (off by one digit) or incorrect barcode assignment
- Solution: Audit barcode assignments, implement check digit validation
Problem: Mobile app camera won't scan
- Cause: Camera permissions not granted or poor lighting
- Solution: Check app permissions in phone settings, improve lighting, clean camera lens
Problem: Barcode labels won't stick
- Cause: Wrong label material for environment (cold storage, oily surfaces)
- Solution: Use industrial-grade labels with appropriate adhesive for your environment
Measuring Success
Track these metrics before and after barcode implementation:
- Inventory accuracy: Target 99%+ (cycle count variance / total count)
- Picking speed: Lines picked per hour (should increase 2-3x)
- Shipping errors: Wrong items shipped (should decrease 60-80%)
- Receiving time: Minutes per purchase order line
- Training time: Days to proficiency for new warehouse staff
Review metrics weekly for first month, then monthly. Adjust processes based on bottlenecks identified.
Summary
Barcode implementation transforms warehouse operations from error-prone manual processes to streamlined digital workflows. Key takeaways:
- Complete setup requires 8 steps: module installation, nomenclature, product barcodes, location barcodes, operations, mobile app, testing, and training
- Hardware investment ranges from $150 (basic USB scanner) to $500+ per station (professional handheld terminals)
- Expected ROI: 99%+ inventory accuracy, 3x faster picking, 60% fewer shipping errors
- Success depends on proper training and change management, not just technology
Frequently Asked Questions
Can I use Odoo Barcodes with Community Edition?
No, the Barcode module is only available in Odoo Enterprise Edition. Community Edition users need third-party modules from Odoo Apps Store or custom development.
What barcode symbologies does Odoo support?
Odoo supports all major symbologies: EAN-13, EAN-8, UPC-A, UPC-E, Code 128, Code 39, Code 93, ITF, QR Code, Data Matrix, and GS1-128 for advanced lot/serial tracking.
Do I need special hardware or can I use phones?
You can start with smartphone cameras using the free Odoo Barcode app. For high-volume operations, invest in industrial scanners (Zebra, Honeywell) for faster, more reliable scanning in various lighting conditions.
How do I handle products without barcodes?
Create internal barcodes using a consistent numbering scheme (e.g., INT000001). Print barcode labels using Odoo's label printing feature and apply them to products or storage bins.
Can barcodes track lot numbers and expiration dates?
Yes, Odoo can parse GS1-128 barcodes that encode lot numbers, serial numbers, and expiration dates. Configure barcode nomenclature rules to extract these fields automatically during scanning.
Need Help with This in Odoo?
Our team at Odoo Skillz can set this up for you: no customization headaches, no guesswork.
References
Ready to Optimize Your Warehouse?
Odoo Skillz specializes in warehouse automation and barcode implementations. Our team has deployed barcode systems for warehouses ranging from single-location operations to multi-site distribution networks.
Services we offer:
- Barcode system design and hardware selection
- Custom barcode nomenclature configuration
- Label template design and printer setup
- On-site staff training and go-live support
- Integration with automated material handling equipment
Contact us at info@odooskillz.com to discuss your warehouse automation needs.